Sunday, December 18, 2011
This is another great activity I saw in The Mailbox Magazine for teachers (I'm obsessed) and I couldn't resist doing it with my kids. I took the liberty of making my own worksheet so I could re-use it through the year. You can download a copy by clicking on the picture below if you are interested.

After printing off the worksheet, you will need to gather 4 different sized containers. I tried to come up with wintery things but as you can see, I wasn't so successful. haha! I picked out a Gingerbread Man Mug, a penguin craft Luke made in preschool with a cup attached to the front, and two different sized jars.

You will also need a small scoop and a bag of marshmallows for scooping.

To do the activity, first have your child draw a picture of each of the objects in the first column of the worksheet labeled "Draw". Then have your child hold the scoop up to the different containers and make a guess as to how many scoops it will take to fill up the container. They write the number of scoops they think it will take in the second column labeled "Estimate."

Now scoop the marshmallows into the containers. After each scoop make sure to add a tally mark in the third column so you won't lose track of how many scoops. The tally marks were especially helpful since my boys took turns making scoops into the containers.

After the container is full, count your tally marks and write the total number of scoops in the third column labeled "Actual Number". Then have fun comparing the numbers with your kids.
Here are my boys completed worksheets.


This would be fun to change up every season with different things for scooping. I'm thinking those Robin Egg candies for Spring and some kind of nuts for Fall. Anyways, I love doing activities with my kids that fun and educational.
I like to link my posts up to THESE great link parties.
Sunday, December 18, 2011 0
Friday, December 16, 2011
So I have a couple Christmas presents for people this year that aren't really wrappable due to their size and awkward shape. I saw this fun idea for making your own wrapping paper in the The Usborne Book of Christmas Art Ideas and realized I could use the same technique and make my own Christmas Gift Bags.


Now granted, I had intended on getting all of my gift wrapping done that day but then added in even more work by making these bags so lets just say gift wrapping is still on the TO DO list...But who cares...I just love my bags!
I'll give you the rundown of how I made them.

I started with plain old white lunch sacks. I happened to have them on hand because I bought them for another craft project, but they are less than $2 at Walmart. I got out the watercolors and for the ornament bag, I used different colors to paint on shapes for the ornaments. I pretty much copied the designs I saw in the book because I liked them so much. You want to thin the paint out a little more than normal for the ornaments because after they are dry, I went back with the same color, only thicker, and made dots or lines on the ornaments. You can see what I mean in the picture below.

After the watercolors were dry I used a journaling pen that writes thick and thin to outline the ornaments. The idea is to not make it look perfect, that's why it's so fun. I love getting to draw out of the lines on purpose. :) I also outlined the lines and circles inside the ornaments and added bows and strings like the ornaments were hanging. Lastly I used gold and red glitter glue to add dots all over the bag and some details inside the ornaments.

For the present bags, I just painted splotches of rectangles all over the bag. Then I drew rectangles around them and added ribbon and bow lines with the journaling marker. I also used a blue and purple marker to add more details to some of the presents.

Lastly, I used silver glitter glue to add dots on the bag and to highlight some of the ribbon on the presents.

When the glitter glue was completely dry, I punched a hole on each side of the bag and used small gift wrapping ribbon to make a little handle for the bag. I attached a gift tag while I was attaching the handle. Put your present in with some matching tissue paper and WAH-LAH....A cute homemade gift bag!


I know these are going to totally end up in the trash as my husband says, but who cares! I had fun making them. Plus they are unique and make a statement. hahaha! I'm a dork! :) Oh, and I totally made my husband tell me TWICE how cute they were before I would give him his dinner that night. LOL!
Happy Crafting!!
I like to link my posts up to THESE great link parties.
Friday, December 16, 2011 0
Thursday, December 15, 2011
Thought I'd post this today in case you missed our guest post over at Adventures in Mommy Land the other day.
One of the books we just finished reading was Rudolph the Red-Nosed Reindeer by Robert L. May.


They are so simple to make and since we added a couple jingle bells to the antlers, my kids have been merrily wandering around the house jingling their puppets all day.
To make a reindeer puppet, start by folding a light brown sheet of cardstock paper in half then open it back up. Use a glue stick to add glue to the top and side of the right half (see picture below).

Then fold your paper back down to glue it shut.

Next use scissors to round the bottom of the paper to give it the shape of a reindeer face.

You can see below how the bottom opens so the child can put their hand in it.

To decorate the reindeer's face you will need 2 large googly eyes, a large red pom-pom, a 3" light brown circle cut in half, 2 strips of 1" x 4" dark brown paper and 4 strips of 1" x 2" dark brown paper.

Have your child make the antlers by gluing 2 of the smaller strips to each larger strip of dark brown paper. Then glue the antlers onto the reindeer along with the half circles which make ears. Then glue on the eyes and nose. I gave my boys a black marker to draw on a mouth.
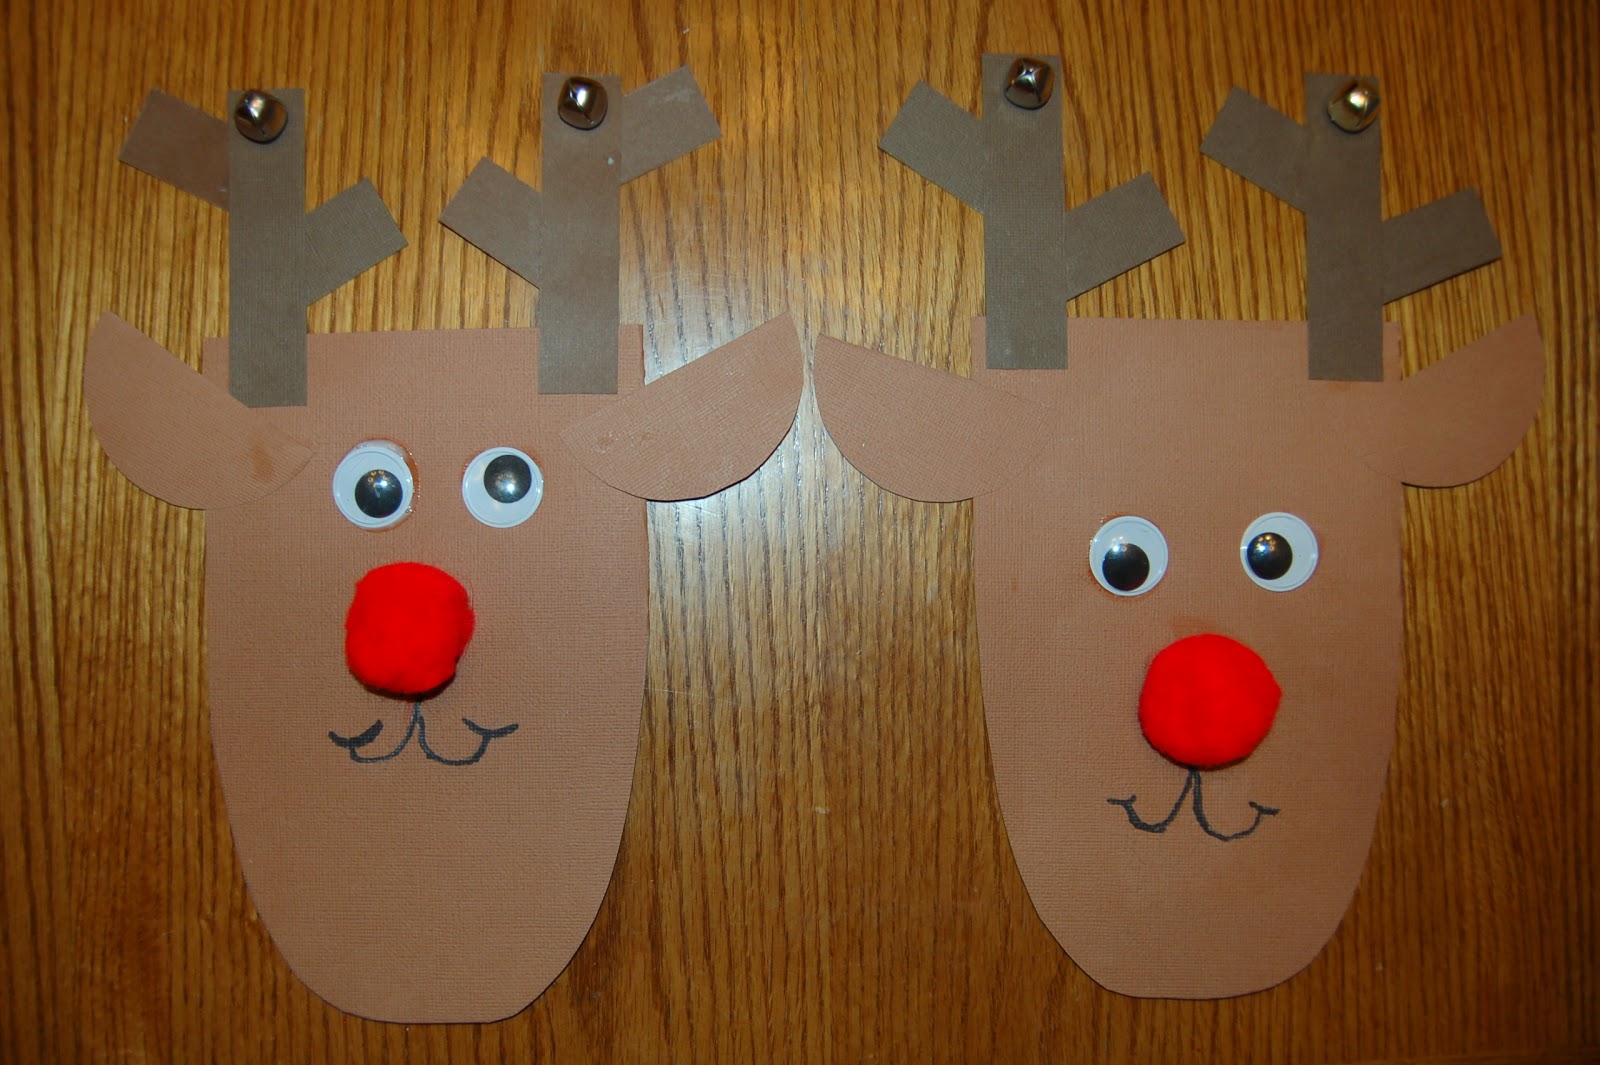
For added fun, I used my hot glue gun to put a jingle bell on the top of each antler. All you have to do now is get out your camera and take a picture of your kids singing "Rudolph the Red-Nosed Reindeer" while jingling their cute puppets. :)

Thursday, December 15, 2011 0
