Friday, December 2, 2011
Make a Snowman out of your child's sock!
Do you like this story?
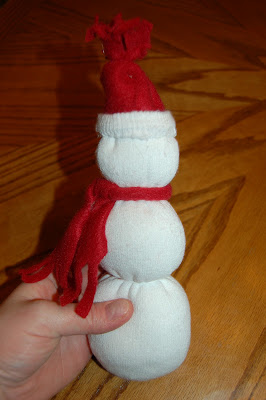
We had a blast the other night making snowmen out of the kids' socks. Look how cute they turned out!
Of course we had to start out with reading a fun book though. We chose Snowmen at Night by Carolyn Buehner.
Have you ever wondered why in the morning a snowman's grin is a little crooked, or his tree branches have moved? This fun book explores the adventures Snowmen might have at night which causes such a change. Of course we all know they are just melting, but have some fun with this book using your imagination. It is definitely a delightful read!
To make our snowmen, we started with a children's sock. You could obviously use whatever size sock you want depending on what size snowman you want to make.
The boys first added a small scoop of beans into the sock to add some weight to the bottom of the snowman.
Then they created a ball from fiber fill and stuffed it into the bottom of the sock. We then used a white plastic elastic to secure our ball in the sock. If you have little girls at your house I'm sure you know what elastics I'm talking about. I bought a huge multi-colored pack of them at the Dollar Store.
We made two more balls out of fiberfill the same way and secured them with the plastic elastics. You don't have to use a white elastic at the top because it will end up being covered.
Next fold the top of the sock down like this and get out your glue gun.
You have to fold up the sock and glue it down about halfway so it ends up looking like this. I hope that makes sense.
To make our hat, I cut out a rectangle piece of fleece and cut slits down one entire side of it.
Fold the sock top completely back down again and glue the fleece halfway down, all the way around the hat. Make sure you leave enough room at the bottom to fold up the white sock to make the brim of the hat.
It should look like this after gluing on the hat.
I then used another small elastic to form the top of the hat, and then folded up the top of the sock to make the brim of the hat.
Use another scrap of fabric to make a scarf for your snowman. Just cut slits in the ends of the fabric and tie it around the snowman's neck. We made one with the same fleece material, one with a fabric scrap I had, and one with a blue ribbon. I wanted to show you how you can really just use anything you have on hand.
Now comes the fun part of decorating your snowman. We first glued buttons onto the snowman with the glue gun. Then we added some googly eyes. We used pink acrylic paint to make the rosy cheeks and after they were dry, we used orange and black puffy paint to add the carrot nose and mouth. Be creative!
I tried to make mine girly with the purple floral scarf and the eyelashes.
I LOVED Andy's eyebrows! Such a manly snowman! I think my snowman had a crush on Andy's snowman. :)
Luke was so worried about adding the details to his snowman but he did soooo good! I let them practice a little on a paper plate with the puffy paint before putting it on their snowman. I wanted them to get a good handle on how quickly it came out.
Now we have a happy little snowman family keeping our couch company by the Christmas tree.
Just to forewarn you, if you have boys, these snowmen may very well keep them entertained for hours after they discover what a fun weapon they are when flinging them at each other. No worries though, they are super soft and as of yet, I have no injuries to report. Only hours of good fun! :)
Happy Crafting!
I like to link my posts up to THESE fun Link Parties.

This post was written by: Franklin Manuel
Franklin Manuel is a professional blogger, web designer and front end web developer. Follow him on Twitter
Subscribe to:
Post Comments (Atom)


0 Responses to “Make a Snowman out of your child's sock!”
Post a Comment