Monday, May 30, 2011

This week we read the story "Go To Bed, Monster!" by Natasha Wing. One night, Lucy could not, would not, DID NOT want to go to sleep. She wanted to draw. But when she picked up her crayons and drew different shapes, Lucy created a Monster, who as you've probably already guessed, is not so keen on the idea of going to bed.

I randomly picked this book off the shelf at the library and after reading the first couple pages I knew it was perfect for my boys. Not only do they love monsters but they are the non-cooperative type at bedtime. I also loved how in the beginning of the story they illustrated how shapes could be used to draw pictures. The little girl in the story continues to draw pictures throughout the story to bring things to life to try to get the Monster to go to bed.

As you know, I am a huge fan of using your imagination so this book was a huge hit for me. This page below about Lucy drawing a mountain of meatballs because the monster was hungry was my boys favorite.

So the question is, if you brought to life a monster from your drawing, what would your monster want to do before he went to bed? This is what I asked my boys before we set off to drawing our very own monsters. I encouraged my boys to use lots of shapes when drawing their monster and told them I was going to have them point out all the shapes to me when they were finished with their picture.


This is Luke's picture below. His monster wanted to eat lots and lots of spaghetti with meatballs. This was a good exercise for Luke to practice his shapes. He was able to point out that he used an oval body, rectangle legs and arms, circle eyes and triangle spikes and teeth.

And here is Andy's picture. He has cool funky green hair and he wanted to eat lots of meat before bed. We didn't really need to practice shapes with Andy since he's almost in first grade, but we still reviewed them anyways.


I thought given the state of our poor, rainy weather here in Utah, my Monster would DEFINITELY be wanting an umbrella and would have lots of FUN jumping in all the puddles outside. I know, I know, I'm silly! :)
Happy Crafting!!
Monday, May 30, 2011 0
Sunday, May 29, 2011
Everyone take a deep breathe to brace yourself for this....I am not a fan in the slightest of the newborn stage....GASP!..Ok, you totally know you were thinking things like "OMG, how could you not LOVE that fresh smell of your newborn baby, it is the BEST!" or "They are only newborns once and time flies by way too fast!"
But for me, I don't know, maybe it's the fact that I am a walking zombie for the seemingly never-ending time period of the newborn stage. Or maybe it's the fact that you don't even know when it's day or night, you just know there is a baby crying every 45 minutes to an hour wanting to suck the life out of you (all that is left of you that is)...Oh yes, those sore nipples are delightful aren't they??...And the 15 poopy splatter diapers a day really make life so pleasant don't they??
Truth be told, I love the first initial days of experiencing my new baby but after that the only thing I truly LOVE about the newborn stage is that I know that once it's over, I will really be able to start enjoying being a Mommy! It's after the first 8 months are over that everything changes for me and I find exuberant amounts of joy in every day with my baby.
Like how now when you are changing the poopy diaper all you have to do is act extremely dramatic about how stinky the situation is and your baby is giggling from ear to ear at how silly you are acting. Like how a quick game of peek-a-boo makes any sad moment suddenly the happiest moment ever!

Like how when everyone in the room starts to laugh, your baby begins to imitate it and it's simply the best, most cutest thing you've ever heard in your life. It's a time when grins start showing cute teeth popping up, when sounds like "Mama" and "Dadda" start becoming more distinct, when they discover they can blow a bubble out of their mouth with their own saliva and they walk around the house doing it over and over again in amazement at themselves.

It's a time when they fit just perfectly on your left hip and you somehow develop super human powers by being able to do everything one-handed like vacuuming, laundry, loading the dishwasher, and even pulling up your pants if need be in a public restroom because you don't dare set your baby on the germ infested floor while you are going potty (hahaha).
It's a time when babies make their first crawl, first stand and first walk. It's that time when they discover their ears for the first time and even realize they are able to get that cute bracelet off of their hand all by themselves that Mommy loves.

It's a time when you realize how cool your older brothers' toys are and when they yell "AHHHH, THE LILA MONSTER IS COMING!" you move even more quickly towards them with a big smile your your face, hoping to be able to destroy a little something.

It's a time when the impossible of climbing those stairs and opening those cupboards becomes a thing of the past and every new thing is exciting. Especially when you discover that making noises into an empty toilet paper roll makes your voice sound really cool. Oh it's the greatest!

Nope, I'm not sad at all that I have a baby sleeping through the night 75% of the time. I'm not sad at all that this little "LILA MONSTER" is no longer a newborn....It is THIS stage that I want to slow down...THIS stage where I wish the clock would just stop ticking for at least a couple extra months to soak in her absolute adorableness (I just made that word up). It is this stage where I could just sit and snuggle with her all day long and never, ever get sick of it.

You are only 9 1/2 months my sweet Lila Bear and you've already discovered so much about the World. You certainly are a handful little one....But it's ok because you're worth it!
Sunday, May 29, 2011 0
Saturday, May 28, 2011
I love being a Mom! I really, honestly believe that God sent me my children more for my sake than for theirs. hahaha One of the simple joys of being a Mother is that every week it is THEM who ends up teaching ME lessons.
What I learned this week:
1. Even when you're in it to win it and are fighting really hard, do it with a smile on your face.

We finished up Spring soccer season this week. Not only was Andy incredible this season but he always played with a smile on his face. I feel like it says so much about his character. He showed joy not only in his own accomplishments (like scoring a goal), but he got just as excited about everyone else's goals as well. I hope when the going gets tough in my own life, I can smile just like Andy does.

2. Be Brave. You're never too young to start chasing girls...Especially when they promise "they won't run too fast so you will be able to catch them." LOL!

But truthfully, my Luke is a shy one. He takes so much after me in this department. Getting out of his comfort zone is terrifying. But when these 3 little girls at Andy's soccer game (who he knows from church) came up to me and said, "Can Luke come chase us?" he braved up and had the time of his life.
It made me realize that sometimes in my own life I give up too quickly or shy away from things and I hope the next time I am faced with a challenge I can be brave like my Luke.
3. It is so much more fun to walk than to sit or crawl.

This little girl of mine amazes me! 9 months old and she is not only walking, but practically running around the house. All I can say is watching her enthusiasm for walking motivated me this week to get off my butt and do some serious walking of my own. I often forget how thankful I am for these two legs of mine but watching her determination to use them to their full capacity has been inspiring.
What did your children teach you this week?
Saturday, May 28, 2011 0
We've been busy this week working on some of our Father's Day creations.
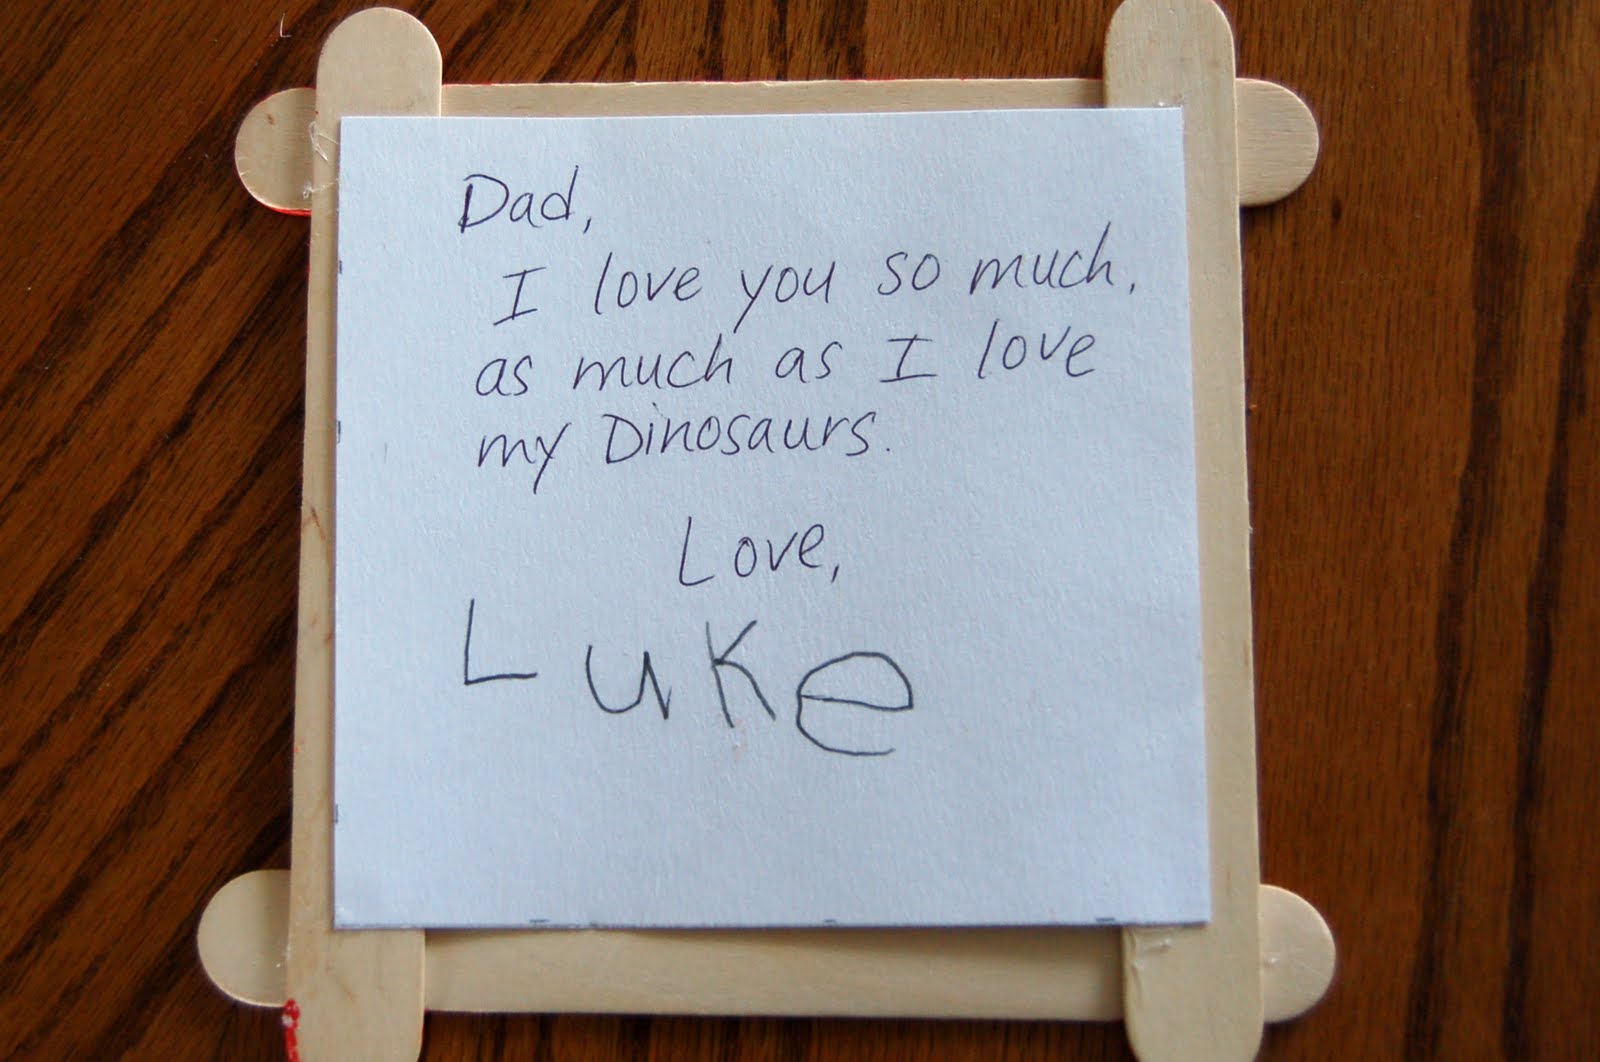
This year we made the familiar handmade photo frame out of craft sticks and my boys colored a special picture for their Daddy to attach to the inside. I thought about putting a photograph inside but decided it was more special being personalized like this.

They also wrote messages to their Daddy on the back. Luke is a dinosaur fanatic so when I asked him how much he loved Daddy he said, "I love Daddy so much, as much as I love my dinosaurs." If you know how much he LOVES his dinos, you know what a sweet sentiment this is to his Daddy. His drawing of a Daddy and baby dinosaur on the front makes it just perfect.
And now that Andy is starting to write, he wrote his own message on the back. I'm loving the picture of his Dad he drew on the top. hahaha! This project is pretty simple but I will add a tutorial at the end of this post if you are interested.

Our Daddy is a teacher at our church one Sunday a month, and he recently scored a small writing desk that was placed on someone's curb with a "FREE" sign on it. He's been using it as his studying desk to prepare for his Sunday lessons so we decided to make a twist on the regular shirt and tie crafts you see every year for Father's Day and we made him a pencil/pen holder to put on his desk. I even found a cute haul truck button to use as a tie pin (which is majorly appropriate since he works for Kennecott as a haul driver in the Mine). I'll include a tutorial at the end for this craft as well.


I am very impressed with the quality of the card and the best part is it ships within 24 hours of you ordering it. So I ordered my card late Tuesday night, it shipped Wednesday and I had them by Friday at noon when the mail arrived. Super fast! This came in REALLY handy when I was late on ordering my Mother's Day cards this year.
Another huge benefit of these cards is that they are the same price, if not cheaper than buying a regular greeting card (REALLY!!!), and they are SO MUCH BETTER since they are personalized with pictures. Plus, if you use coupon code AMBABY20 right now at checkout, you will receive 20% off your order. I purchased 3 cards and my total was $10.20, which includes shipping charges, so if you are on a budget, this gift is PERFECT!!

And I just loved this silly card I chose with the mustaches on the front and the inside which said, "Taking the time out from our usual mischief to wish you a Happy Day!" I think it's so funny! You can personalize the words however you want also.

Tutorial for Craft Stick Photo Frame
Materials you will need:
- 4 crafts sticks (the tongue depressor size)
- hot glue gun
- paint
- paint brush
- white sheet of card stock
- scissors
- crayons

Directions:
1. Glue the 4 crafts sticks together using the hot glue gun to form a square frame.

2. Paint the frame and let it dry completely.


3. Cut a square piece out of the white card stock paper about 4 1/2" x 4 1/2". You might want to measure your sticks to see your exact dimensions.
4. Draw and color a picture on the card stock square. I encouraged my children to color a picture of them with their Dad, or something similar.


5. On the back of the card stock square, write (or help your child write) a personal message for their Dad.

6. Now it's time to assemble the two pieces together. First, dry fit the picture to the back so you can see if you need to trim any edges. I had to trim edges off the top because my children colored too close to the bottom of the square. This is why I cut my squares a little bigger in the beginning to allow for some room to play with.

7. Put a dot of hot glue in each corner on the back of the frame and place your picture face side up on the glue to attach it to the frame.


8. At this point you are finished but you can glue a piece of string to the top corners so it can hang somewhere, or you could also attach a magnet so it can hang on the fridge.
Tutorial for Shirt & Tie Pencil Holder
Materials you will need:
- soup can
- sheet of white contact paper about 4" x 12" (depending on the size of can you use)
- 5/8" ribbon, about 24" long
- tape
- 2 white buttons
- small decorative button for tie pin
- marker

Directions:
1. Enjoy a bowl of soup for lunch. hahaha Italian style vegetable was not actually my first choice but it was in my pantry and needed to be eaten so it will do. LOL! After consuming your lunch, wash the can, remove the label, and let it dry completely.

2. Apply your white contact paper to the can. It doesn't matter how much it overlaps (I actually think it looks better the thicker it is on the can).

3. See the picture below where you can see the line where the contact paper ends. This is the place we will be working with because this little line creates the front of the shirt where it buttons up. (get it??)

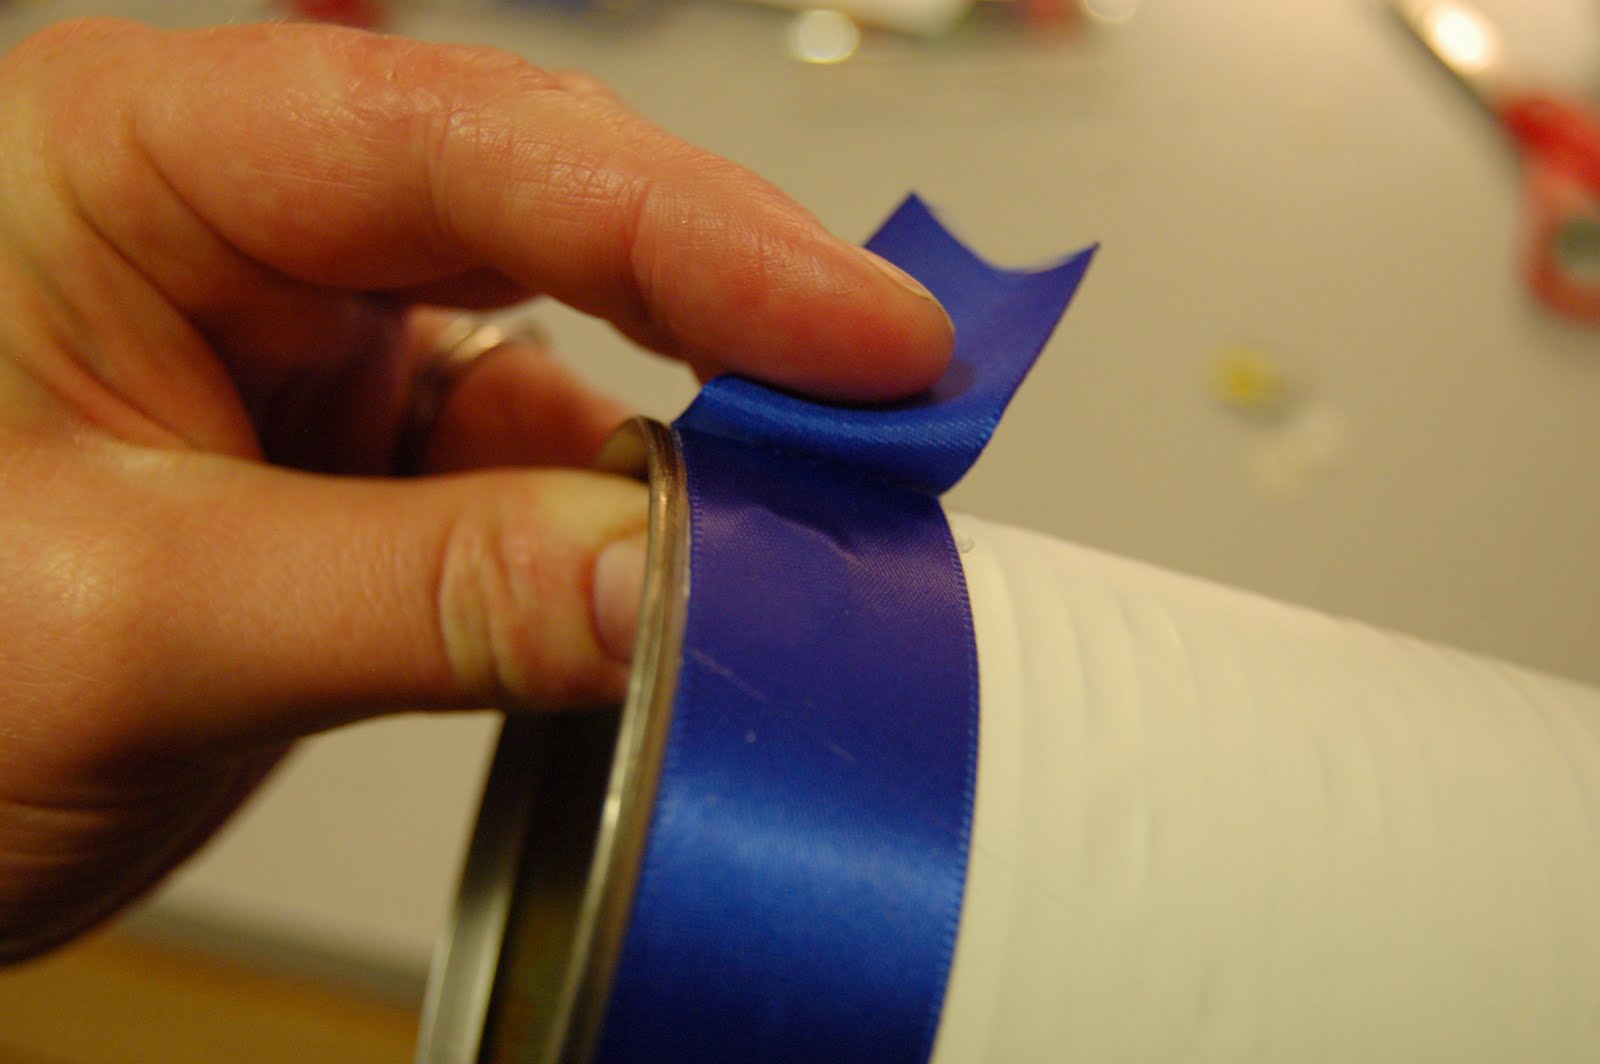
4. Now it's time to make the tie. Cut your ribbon in two 12" sections. Tape the ends of one of the sections to a table or counter top.

5. Take the second section of ribbon and wrap it underneath the other section (see picture below).

6. Wrap the bottom section to the front of the top section.

7. Now take that section and wrap it underneath the section on the table. (see picture below).

8. Now wrap that section through the top section to make the tie knot, and tighten it. Geez, what that confusing or what?? I would use my pictures as a diagram of how to make the tie, but if all else fails, do a google search on it, if my directions aren't clear to you.

9. Remove the tape from the ribbon and dry fit it around the can making sure the tie is at that line we talked about earlier. You will most likely have to cut off excess ribbon to make it fit right. Tighten the ribbon around the can as much as you can and use the hot glue gun to glue the ribbon to the can.
10. Now use your scissors to trim the bottom of the tie and cut the edges like below.

11. Glue two white buttons to the bottom of the can so it looks like a white shirt.

12. Use the hot glue gun on the decorative button to glue to the top of the tie to make a tie pin. I also glued the two sections of the tie together so the back section stayed put.
13. Write a special message on the back using the marker and you are finished!! Now just add some freshly sharpened pencils and a couple new fancy pens for finishing touches.

Ok, don't judge my terrible hand-writing. I didn't realize how hard it would be to write over all those bumps on the can. So if I had to do it all over again, I would write my message on the contact paper first before putting it on my can, so it looked better. Or I guess you could write it on a separate sheet of paper and glue it to the back.
Happy Crafting!!
