Friday, May 4, 2012
Toucan Craft
Do you like this story?
Are you sick of paper plates yet?? I can't seem to create something without using them lately. The inspiration for this craft came from Chalk Talk. I saw how they used a paper plate for a beak and it was an instant winner for me!
At our recent trip to the Tracy Aviary, Luke was delighted to see a Toucan. He told me it was his most favorite bird he saw while at the Aviary. That definitely warrants a craft don't you think? :)
I desperately tried to find a fiction children's book about a Toucan but walked out of my local library empty handed. There was one board book I found but those are way out of Luke's league. After some searching on the Internet I found a book with good reviews titled "Go Tell it to the Toucan!" by Colin West. Only problem is my library doesn't carry it. Out of desperation I purchased it on Amazon, but since I only paid $.01 for it plus $3.99 shipping, it is being delivered at the very slowest rate possible in our postal system. Bummer! Once I get it I will update this post. In the mean time, if you know of any books with a toucan in them, I would love suggestions.
Here is how we made our Toucan craft.
1. Cut a small (dessert size) paper plate in half. Cut the end of one of the half's off and give it a little bit of a curved shape at the bottom to form the beak. Here's a close-up of the beak so you see what I mean.
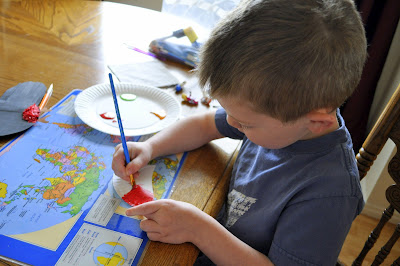
2. Next paint the beak with different colors and paint the other half of the paper plate black. The black half will be the wings of the Toucan. We modeled our beak after the Toucan we saw at the Tracy Aviary pictured above, so Luke used red, light green and orange in his beak.
3. If you would like to use the same Toucan body template that I used, I saved it on Google Docs HERE for you to print off. I traced the body template onto a black piece of cardstock paper for Luke to cut out and I cut out the two feet on brown cardstock paper.
4. For the tail feathers, I simply traced Luke's closed hand on a piece of black cardstock paper and cut it out, then Luke glued it onto his Toucan body.
5. To replicate the yellow and red feathers on the Toucan face and underbelly, I outlined the areas with white crayon, then Luke glued crumpled tissue paper in those areas.
6. To finish the Toucan, Luke glued on the feet, a large wiggly eye, the black wing and the colorful beak.
It's almost as cute as this other Toucan I saw at the Tracy Aviary....
But not quite!!! ;)
Happy Crafting!!
I like to link my posts up to THESE great link parties.

This post was written by: Franklin Manuel
Franklin Manuel is a professional blogger, web designer and front end web developer. Follow him on Twitter
Subscribe to:
Post Comments (Atom)


0 Responses to “Toucan Craft”
Post a Comment